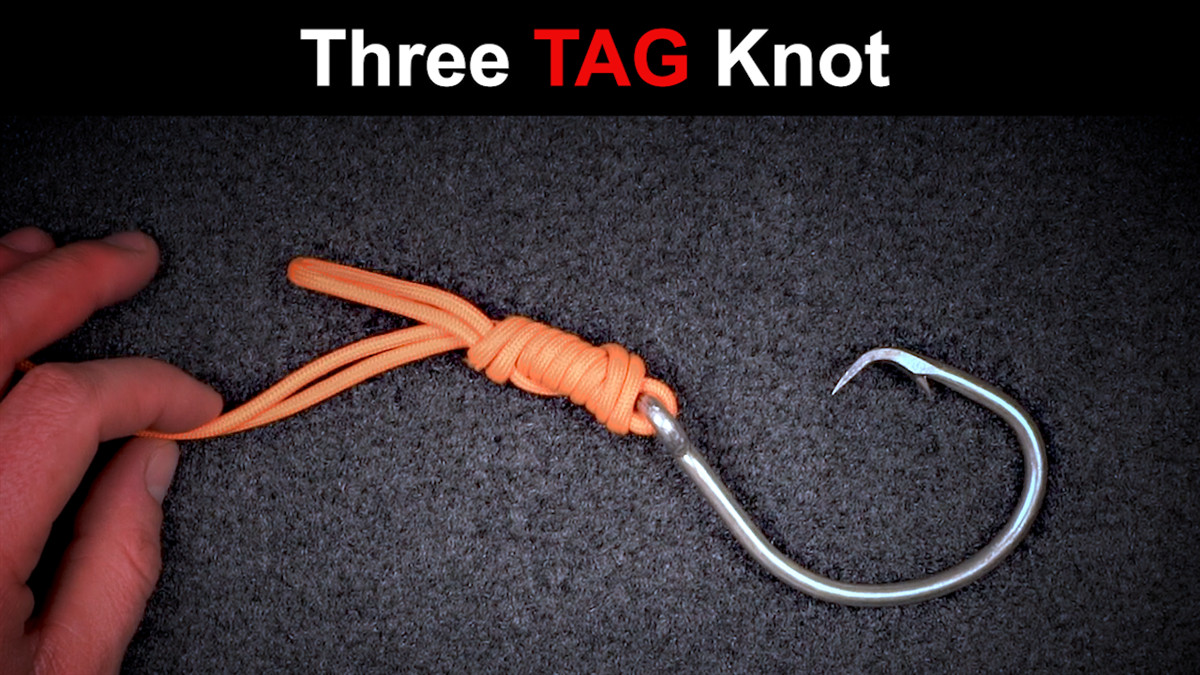
The Three-Tag Knot, sometimes confused with the Double San Diego Jam Knot which has one more step, is a high-performance line-to-lure knot that excels in break strength and many anglers feel it delivers excellent shock performance with heavy lures and powerful hooksets. It can be a bit cumbersome to tie with heavier line diameters, particularly with fluorocarbon, but delivers exceptional performance in power-fishing situations.
The main thing is you have a double line doubled up around the eye and around the knot to give a larger knot that can handle the violent snap hooksets some anglers use. And it can handled a lot of abrasion like flipping a jig around wood or metal docks.
Here is a quick rundown on how to tie the 3-tag knot.
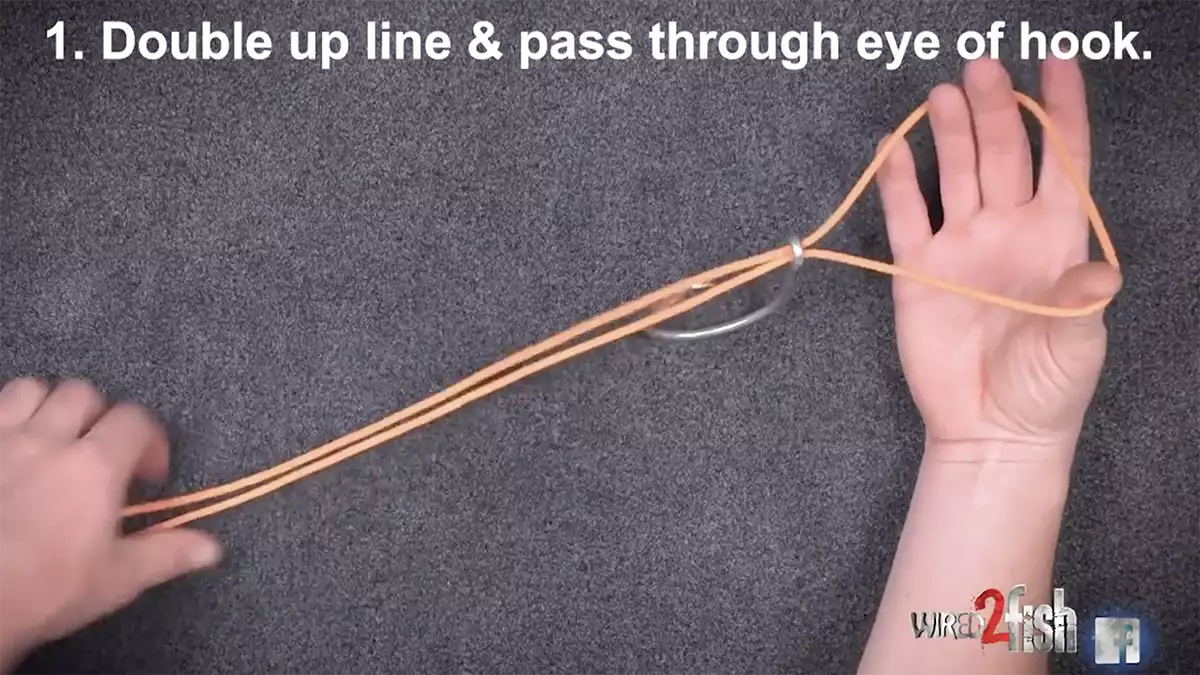
Step 1 – Double the line and pass it through the eye
The first step is to double your line and pass it through the eye of the hook or split ring on your lure. If it’s thicker line and a small eye, you can pass the end of the line through and then double it back through the eye so you have a loop on one end of the eye and the tag end and mainline on the other end of the eye.
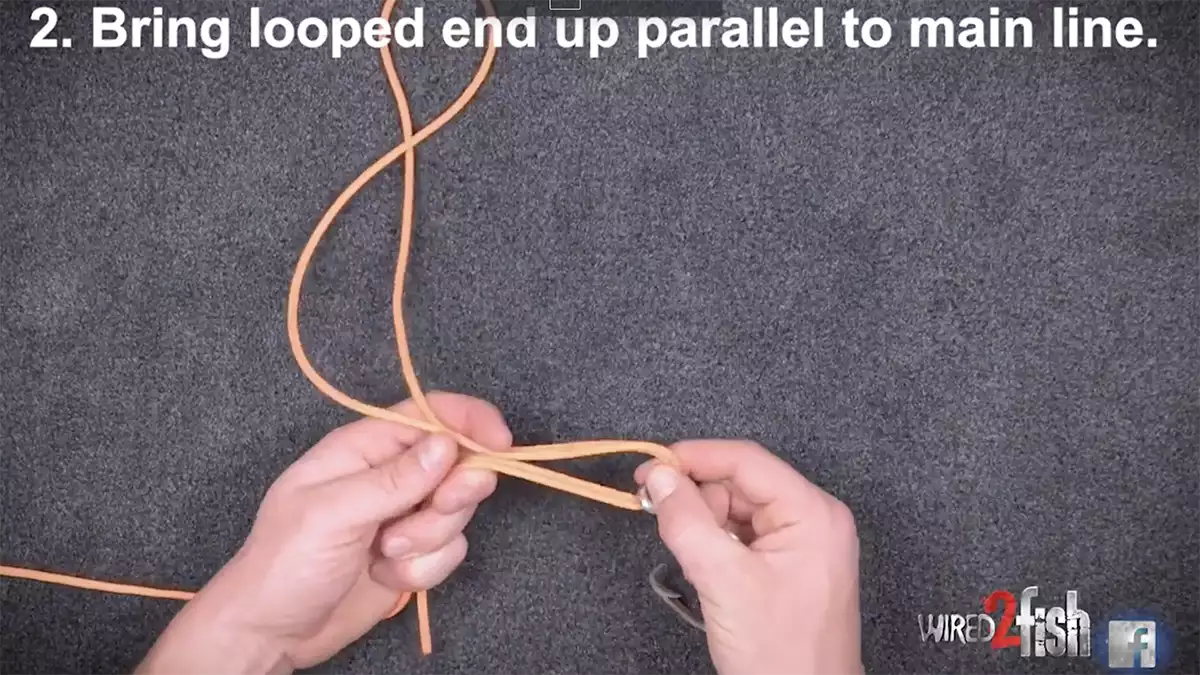
Step 2 – Parallel the looped line to the main and tag line
This prepares you to wrap the doubled line loop around the mainline and tag line simultaneously.
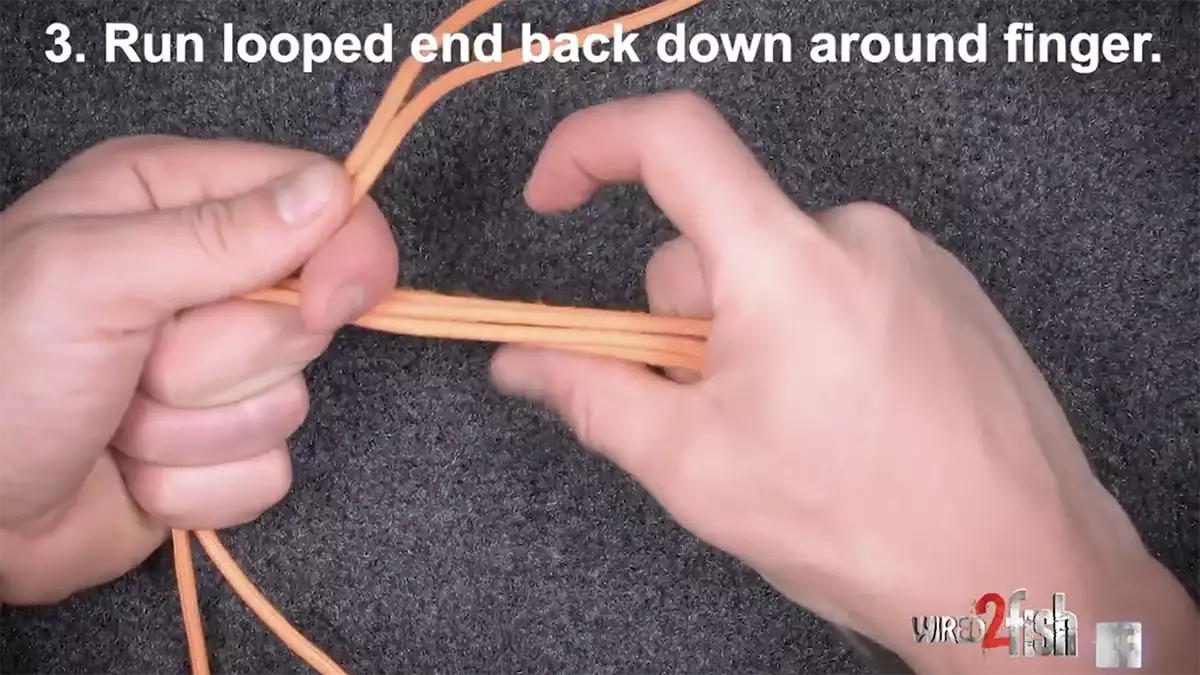
Step 3 – Begin wrapping looped end around lines
The looped line will be wrapped around the main lines and you will end up with several wraps down the line. To do this you need to hold the looped line with your left pointer finger leaving yourself enough length to wrap the line around multiple times. Usually a couple of inches is sufficient. So you have all four lines in your left hand and you will use your right hand to wrap around the main and tag lines.
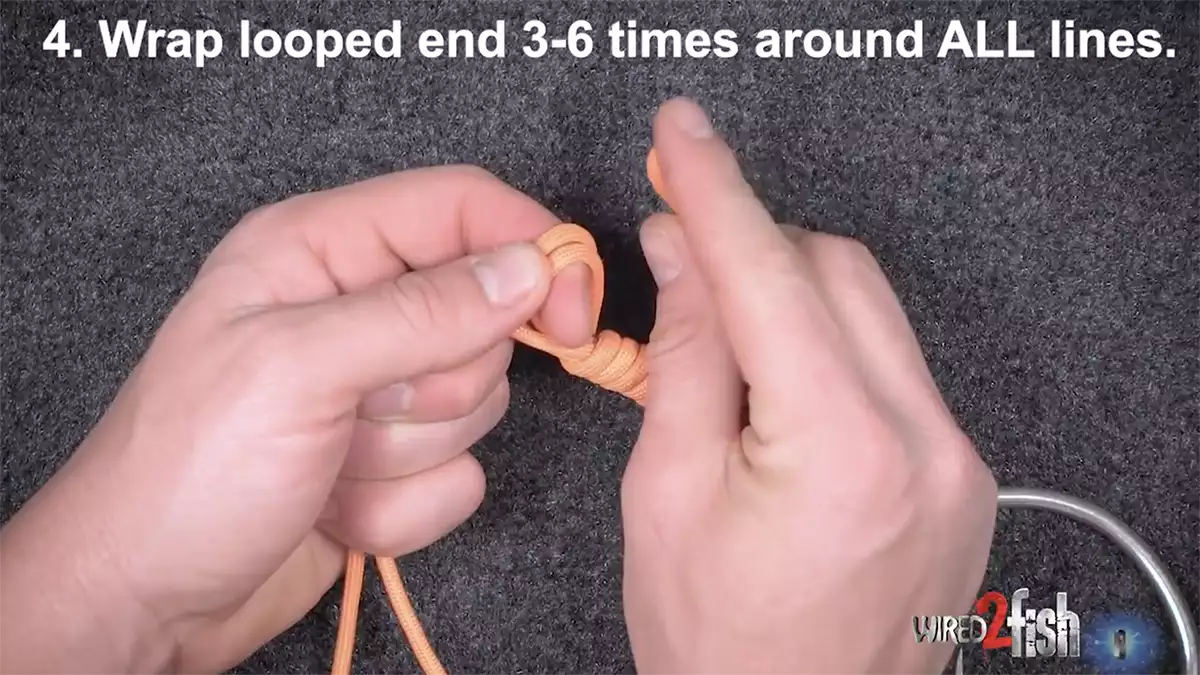
Step 4 – Wrap your loop line around 3-6 times
Wrap your loop end around the main and tag lines 3 to 6 times depending on line diameter. The heavier the line the less wraps you need or will be able to fit without making the knot too large. I will wrap 6 wraps if I’m using 6-12 pound line. and I will wrap 3 or 4 wraps if I’m using 15-25 pound line.
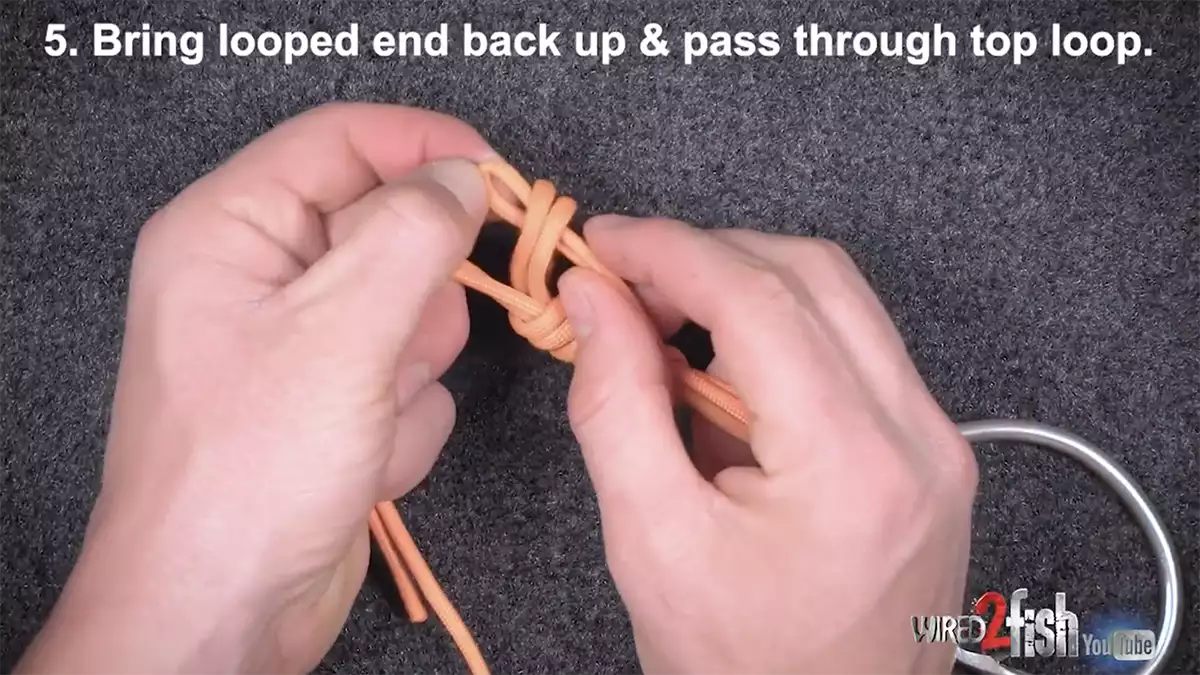
Step 5 – Pass end of loop end through the top loop
Now take the small loop at the end of the wraps and pass it back through the loop at the top of the knot formed where you held the 4 lines in the your left hand and had the loop end around your finger.
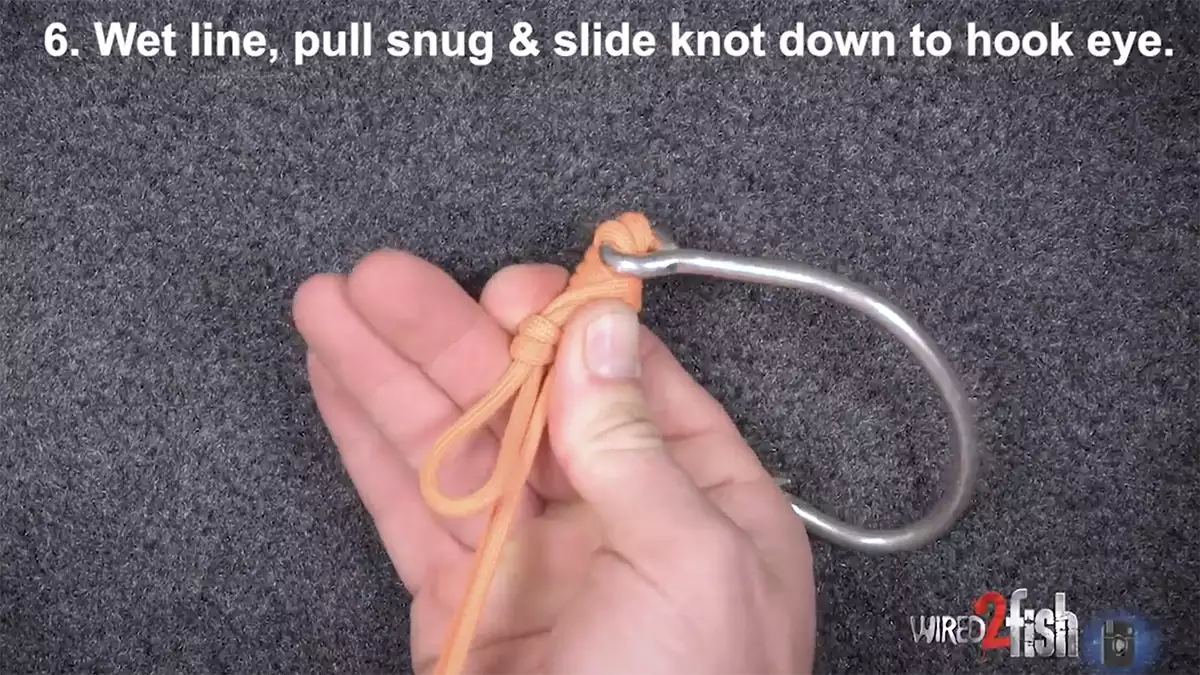
Step 6- Wet, Snug , slide knot down tight to lure or hook
Now pull that loop and your main and tag ends tight, sliding the wraps and knot down and together at the eye. Be sure to wet the line as these wraps if tight can scrape or degrade your line. Once tight make sure your wraps and the size of the knot is good.
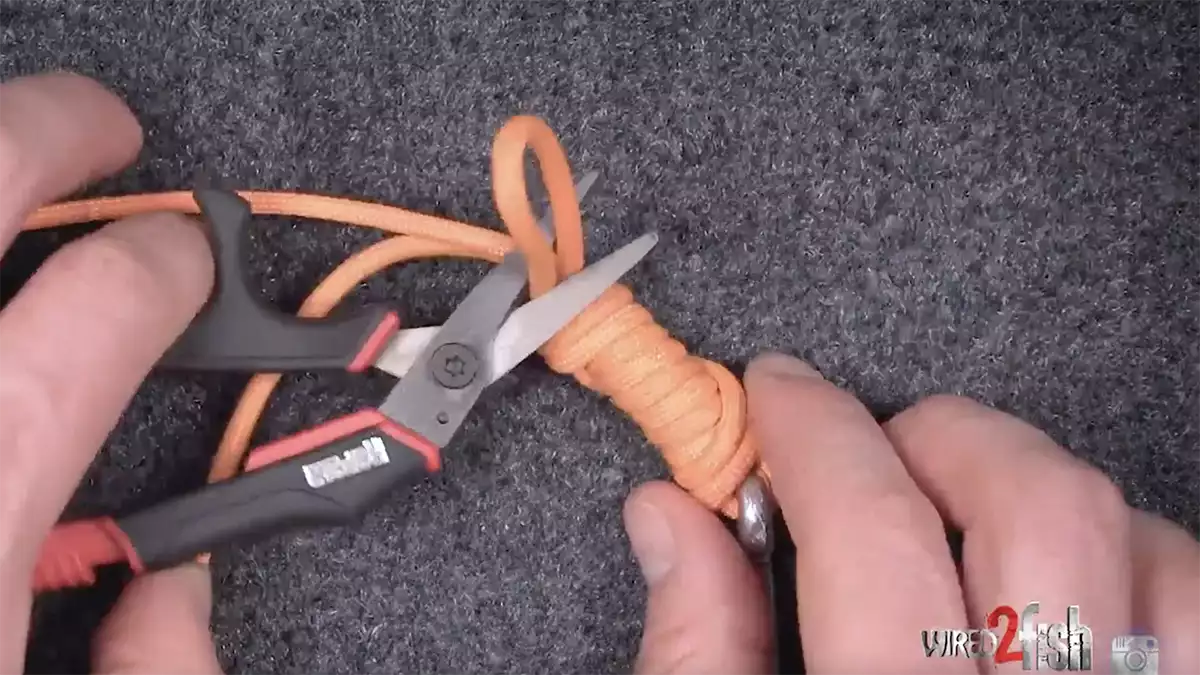
Step 7 – Clip loop and tag ends
Now that the knot is tight, clip the loop, leaving two tag ends and the original tag end short to the knot. You know how have snug, strong, abrasion resistant, shock proof knot.
When to tie the 3-tag knot
Gerald Swindle and Mark Zona call this there go-to knot for bass fishing with fluorocarbon. It’s strong and works well with applications where you might be fishing in and around abrasive cover or anytime you need to really lean on the fish, which is often the case with flipping and pitching.
What others have to say about the 3-tag knot for fishing
Swindle has a pretty funny take but great advice on tying this knot and other knots in general.
You can watch his video here:
.embed-container { position: relative; padding-bottom: 56.25%; height: 0; overflow: hidden; max-width: 100%; } .embed-container iframe, .embed-container object, .embed-container embed { position: absolute; top: 0; left: 0; width: 100%; height: 100%; }
Please visit our popular Wired2Fish Fishing Knot Guide if you have any other questions regarding various types of fishing knots for similar and different applications.


