The Trilene fishing knot is very similar to the Improved Clinch but with one variation that gives it more surface area to the ring you tie the line.
Here’s a quick rundown on how to tie the Trilene Knot for fishing.

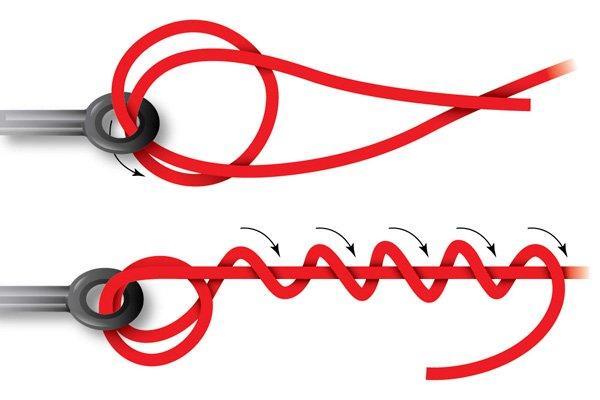
Step 1 – Pass the line through the eye twice
Pass the tag end through the eye of the hook, circle back around and pass it through a second time, pulling enough tag end through to wrap around the mainline in the next steps.
Step 2 – Wrap your line
Wrap your tag end up the line from your two loops through the eye 5-7 times and bring the tag end down to the hook eye again.
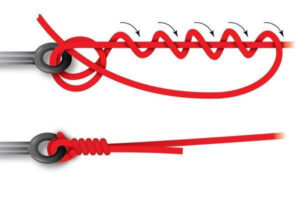
Step 3 – Pass tag through double loop
Pass the tag end through the double loop you created at the beginning of the knot and pull the tag end tight on moistened line. This gives you a double wrap around the eye for better wear and tear while fishing. A little beefier connection than the improved clinch if you will.
Step 4 – Finish by trimming your tag
Leave a little excess as you trim your tag end as this is a slip knot and can pull tighter as you fish. It will take a little practice to loop it through the eyelet twice and then get the tag end back through there after your wraps. But you will get adept at tying the knot quickly after a few tries. And eventually you can tie it by feel without even looking.
How to Tie a Trilene Knot for Braid
More fishing knot instructions
For more fishing knot instructions check out our best fishing knots guide.
illustrations by Brian Lindberg


