The Palomar Knot is maybe the most fundamentally known knot in bass fishing, and with the creation of fluorocarbon fishing lines, maybe the most discussed and argued knot used by bass fishermen. In this article, we will cover the tying instructions (including a couple of helpful videos) and discuss when to use it, variations, and common mistakes when tying the Palomar knot.
As for its benefits, the knot is simple to tie, very strong if tied correctly with no crossing, and works for most every type of line. The Palomar Knot offers double connection around your hook eye or line tie. It’s a fairly small but very strong knot. It makes sense to tie when you want no slipping on your knot as it’s pulled tight by fish, snags, or other strain on the line.
How to tie the Palomar Knot – step by step
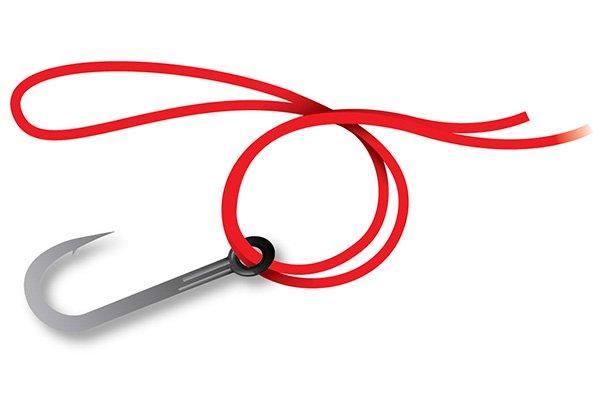
- Step 1 – Pass your doubled line through the eye.
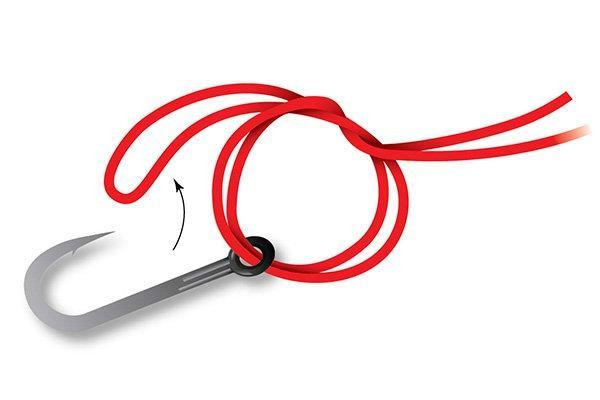
Double your line and pass it through the eye of the hook or split ring. If the line is thick, pass the line through the eye, then give yourself a bunch of slack and pass it back through the eyes so you have a doubled end loop on one side and mainline and tag end on the other side. - Step 2 – Tie a simple overhand knot with the looped end.
Take the doubled line on one side of the eye and the main line and tag end and tie a simple doubled line overhand knot. Don’t pull it down tight just yet. - Step 3 – Pass the loop over the hook or lure and flip the loop up over the main line and tag end.
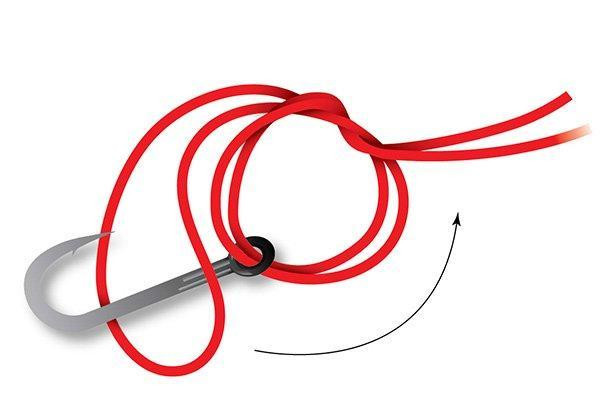
Once you have the loop above your new overhand knot, open that loop up and pass your hook or lure through the loop and bring the loop over everything including your overhand knot. - Step 4 – Wet line and slowly pull it the tag end and mainline until tight.
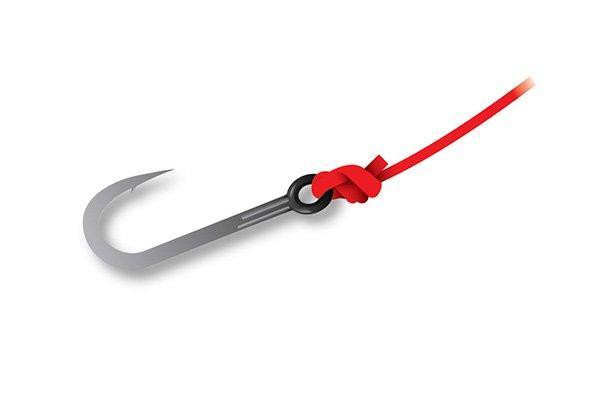
Try to keep your lines from crossing and slowly cinch it all down until snug. Where most people run into problems with the Palomar knot is they don’t wet the line, pull it tight too early or have lines crossed and burn their line tightening it all down. Once tight you can cut the tag end pretty short because the knot won’t slip much.
The Improved or Double Palomar Knot
One variation of the Palomar knot is the improved or double Palomar knot. People will typically use this one with braided lines or smaller diameter lines where they think a slight bit of slippage may occur.
To tie the Double Palomar Knot, follow all of the above instructions, except on step 2 when you make your overhand knot, take the loop through a second time to make a double overhand knot. It will give you more wraps when you cinch the knot down and a bit more strength and guarding against any slippage.
When to Use the Palomar Knot
The Palomar knot is great to use when you need to tie a quick knot, when you want a lot of strength without a ton of bulk and when you are using braided lines with waxy finishes that tend to slip more and not bite as much as standard monofilament and co-filament lines. It really works great with all lines, so it’s one of the main knots an angler should know.
Precautions when tying
If you’re not careful, you can cross your line (or create an x with your main and tag end) as you pass it through the eye and then make your overhand knot. If you do this with fluorocarbon, you increase the risk of the line abrading on itself and causing breaks. If you can think about keeping your lines parallel while tying the knot, you will not have any issues whatsoever with this knot. Here is a great video explanation of why some people’s fluorocarbon knots fail.
The Palomar Knot is worth your time to learn. Practice tying it and you will get to where you can tie it in about 15 seconds on the water, which is a great advantage when rigging tackle while fishing. Besides the Uni Knot and Improved Clinch (or Cinch) Knot, the Palomar Knot is maybe the most popular fishing knot of all time.
Here’s another video with 2 tips to tie a better fluorocarbon knot.
More Fishing Knots Tips


