Tackling issues with trailer lights can be one of the most troublesome problems for boat owners. It doesn’t matter what kind of boat it is; having functional trailer lights is a safety issue that should never be undervalued.
There are some easy tips to make sure your lights work right every time.
Check the ground
The ground is a critical component of properly functioning trailer lights. Flickering lights on the trailer is usually a ground issue. Basically, a trailer wiring is grounded one of two ways; either from the truck via the trailer hitch and ball or via a dedicated ground wire from the wiring harness.
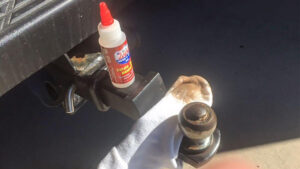
Make sure the hitch ball is clean from rust. This is very important, so lubricate it every now and again with a light grease or oil; simply put a small amount on a rag and coat the ball.
If running a separate wire for the ground, make sure it makes good contact with the trailer from the plug. Scraping the paint away from a small area where the ground wire connects will ensure it is making contact. A small shot of a light oil like Lucas Toolbox Buddy or WD-40 will also keep it free from rust. Most trailers have a hole drilled near the hitch for that wire but if not, just drill a small hole, use a small bolt and lock washer with a nut and you will be good to go. Stainless steel bolts are highly recommended.
Submersible versus regular bulbs
If you have submersible lights, it’s okay to keep your plug plugged in. But trailers that have standard 1156 or 1157 trailer lights are best unplugged as to not blow the bulbs upon water contact. These traditional lights become hot and when cooler water hits them, it can result in a failure. Once a year, take the lens off your traditional lights and use a bit of Vaseline or light grease on the bulb bases. This will prevent rust and get a better contact.
Tidy up wires
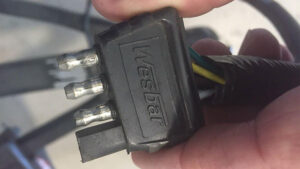
Never leave wires hanging from your trailer. They can catch on weeds and other objects and pull loose. They can be cleaned up easily by using a couple of zip ties. This is particularly important near the lights themselves and around the license plate. Check your connectors on the truck and trailer regularly for bare or broken wires. Depending on the type of connector—round or flat—check both the male and female connections too. Clean up corrosion or dirt on connections with a lightweight oil.
Carry spare bulbs and fuses
Bulbs and fuses are common reasons for malfunctioning trailer lights. Check your truck fuses if all of the lights are not working. They are usually 10-amp fuses, red in color, for trailers. If you are using traditional bulbs, always carry a couple of spares too. Most trailers use an 1156 bulb that can be found at any auto parts store.
Tools
You never know when a wire could break on your trailer so carrying a set of wire pliers or crimpers, some spare wire and some submersible butt splices is a good rule of thumb. Wires can be easily stripped, and a butt splice added and crimped will get you back in business. Extra wire can be used to increase length if necessary. A roll of electrical tape is also a good addition to this kit. We use liquid tape a lot but the connection needs to be dry for it to adhere properly.
If replacing tail lights on your trailer we recommend LED-style lights for replacements. They are brighter and last much longer. They are also submersible. Follow color codes on the wires to ensure the lights are set up correctly. If the wires run through a hole in the trailer it’s easy to thread them through a small piece of plastic tube in the hole to keep them from fraying and causing a short due to water pressure or road vibration.
Trailers can be troublesome but by following these tips it may be a simple fix and allow you to spend more time on the water instead of under the trailer.


